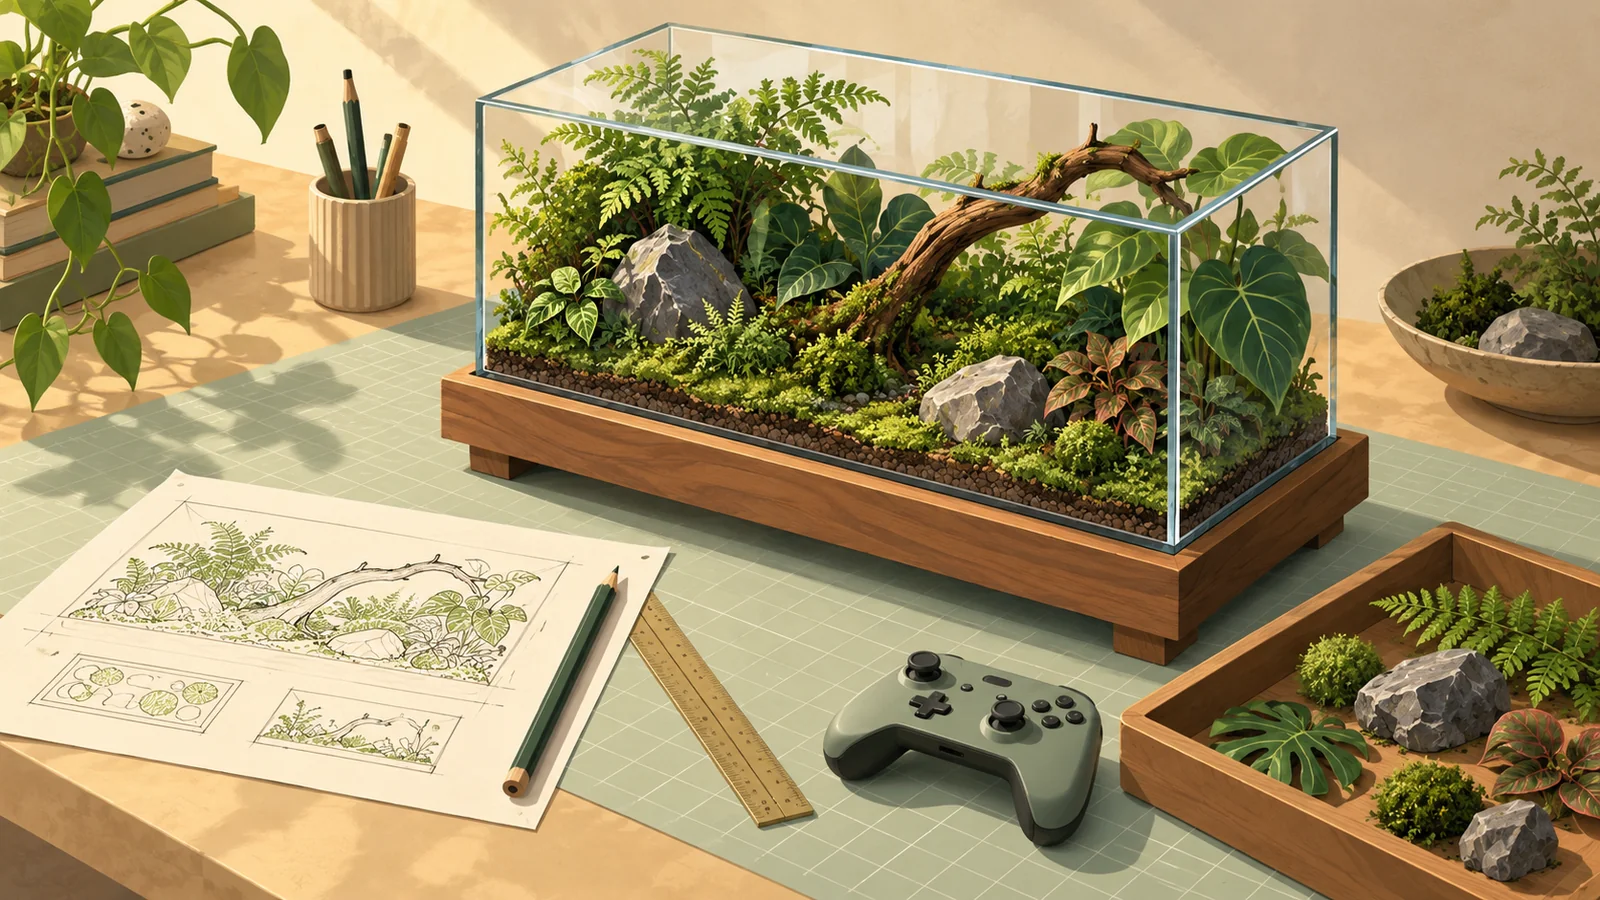
A branch sits a little too far forward. The plant beside it takes up more room than expected. The water bowl still fits, but that corner is starting to look crowded.
A shopping list is not much help with these decisions. You want to see the objects together, move them slightly and look at the space from above. That is why I built Terrarium Studio for Geckio: a browser-based 3D planner for arranging a small natural world.
The public beta is free to use and requires no account. Set the interior dimensions, place plants, branches, rocks and accessories, then save the design locally or as a file. You can start planning a terrarium online straight away; if you want to build a 3D planner yourself, this article also explains the decisions behind the Three.js scene.
The way it felt was part of the product from the beginning. Placing a plant or moving a rock should be enjoyable. At the same time, enclosure dimensions, object sizes and positions needed to remain understandable. That combination has become a public beta that sometimes feels like a small building game.
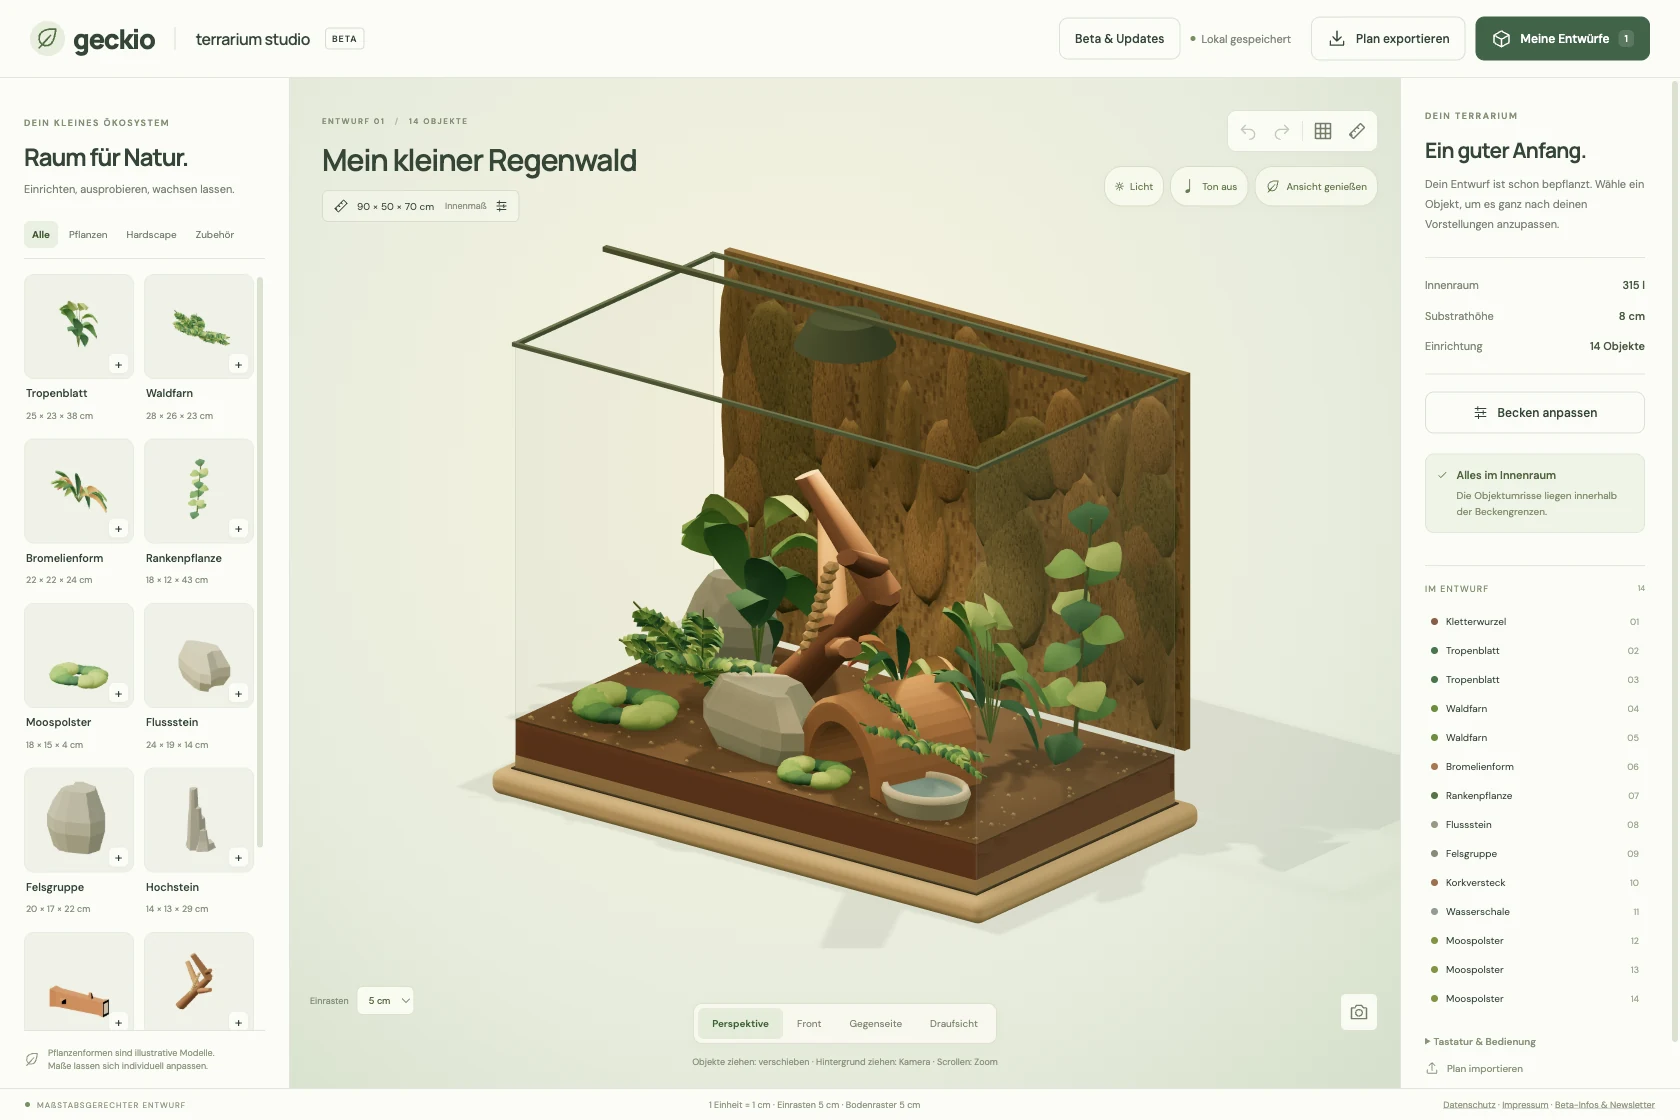
Planning a terrarium online: from dimensions to layout
A 3D terrarium plan is useful for checking space and proportions before furnishing the real enclosure. For a first design, I would follow this sequence:
- Establish the species and enclosure shape. The intended animals’ requirements guide the plan. The Geckio terrarium size calculator, available in German, helps you review dimensions from species profiles.
- Enter usable interior dimensions and substrate depth. The example in this article measures 90 × 50 × 70 cm. With 8 cm of substrate, 62 cm of height remains above it. This is an example calculation from the studio, rather than a size recommendation for any particular species.
- Place the large items first. A branch, hide and water bowl establish the arrangement. Add plants afterwards. It becomes easier to spot furnishings competing for the same space.
- Compare front and top views. Check how the height is used from the front, then examine floor space and access from above. Measure actual natural materials as well, since their shapes differ from the simplified models.
- Copy variants and keep a backup. Save an alternative arrangement in the same browser. Export the plan as JSON for a backup or a different device; PNGs provide visual references.
For practical preparation, I also wrote a guide to planning a terrarium in 3D on Geckio, in German. Here on TOSA, I also explore how that workflow translates into a usable web app.
Start with a small rainforest
The initial question was practical: could a terrarium planner work as a friendly, spatial tool in the browser? With plants, wood and rocks that you would actually want to pick up and rearrange?
The first useful version did not need an enormous catalog. A furnished enclosure, editable interior dimensions, a few distinct object shapes and several camera views were enough to explore the workflow. Saving, undo and export joined them early. Changing a design should leave a way back to the previous idea.
I chose a furnished starting point. Open the studio and “Mein kleiner Regenwald” — my little rainforest — is already there, with plants, a climbing branch, rocks, a hide and a water bowl. You can select something and move it immediately. Empty landscape and tall templates are also available for your own designs.
The example doubles as an introduction to the interface. It shows what the tool can do before you have learned every button.
Pick it up, then refine it
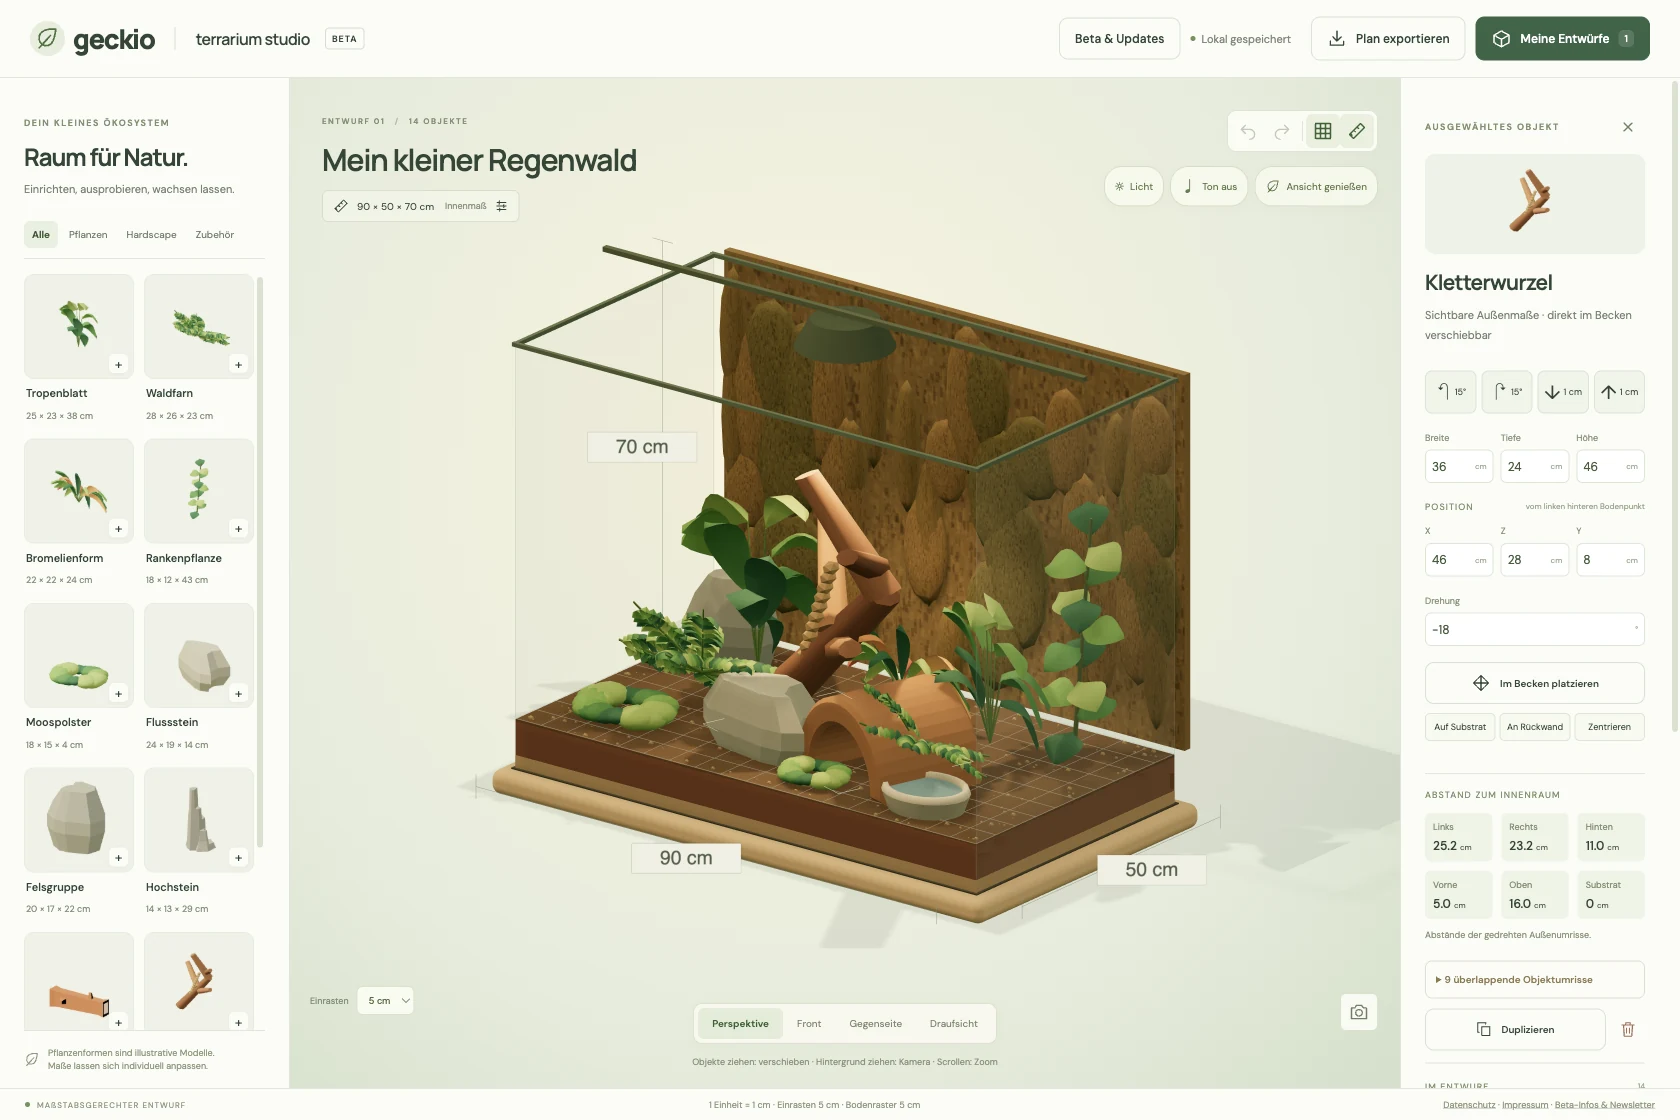
A spatial planner should answer spatial questions directly where possible. Objects can therefore be dragged inside the enclosure. Dragging the background rotates the camera. In the front view, dragging an object also changes its height; in the other views, it moves horizontally at its current elevation.
For finer adjustments, there are numeric fields, small rotation and height steps, and alignment to the substrate, back wall or center. Keyboard controls complement those actions: arrow keys move an object, Shift increases the step and Escape cancels a drag in progress.
Snapping starts at five centimeters. You can switch to one centimeter or free placement for smaller adjustments. That lets you explore a composition and then inspect its distances without moving to a separate tool.
Small reactions give it the feel of a building game
The playful impression comes from many small decisions. The wooden base has rounded edges. Plants and rocks are deliberately stylized. Light and shadows give the shapes depth, without turning the scene into a photorealistic material preview.
Movement adds another layer. A new object appears with a brief pop. During a drag, it follows the target position with a little elastic lag. After release, it settles. The action becomes more visible and feels a little like setting down a physical object.
Sound is similarly restrained. Picking up, placing, snapping and deleting can trigger short synthesized tones. Audio starts muted and can be enabled deliberately. The beta uses simple sounds generated in the browser; a more developed set for wood, stone or leaves would be a further step.
Motion preferences matter here too. Reduced motion removes the pop and stretch effects as well as eased movement. When there is no active interaction or animation, the renderer does not keep a continuous animation loop running.
The animation must leave the plan intact
Beneath the interface is an important separation. The saved plan contains the enclosure’s interior dimensions and each object’s size, position and rotation. One unit in the 3D scene represents one centimeter. Substrate occupies part of that interior, reducing the usable height above it.
The small deformations during interaction live on a separate visual layer. A rock briefly settling or a plant growing into view does not change its stored dimensions. For image exports, the scene restores the undeformed object poses.
A drag also becomes one entry in the undo history only when you release the object. Escape restores its previous position. This is a quiet decision with a substantial effect on the workflow: one small move can be undone with one action.
Those sizes still represent planning envelopes. A real piece of wood is less regular than its model. Clearance displays and overlapping-outline hints help you understand the space; they do not certify whether two actual surfaces collide.
Lighting for looking
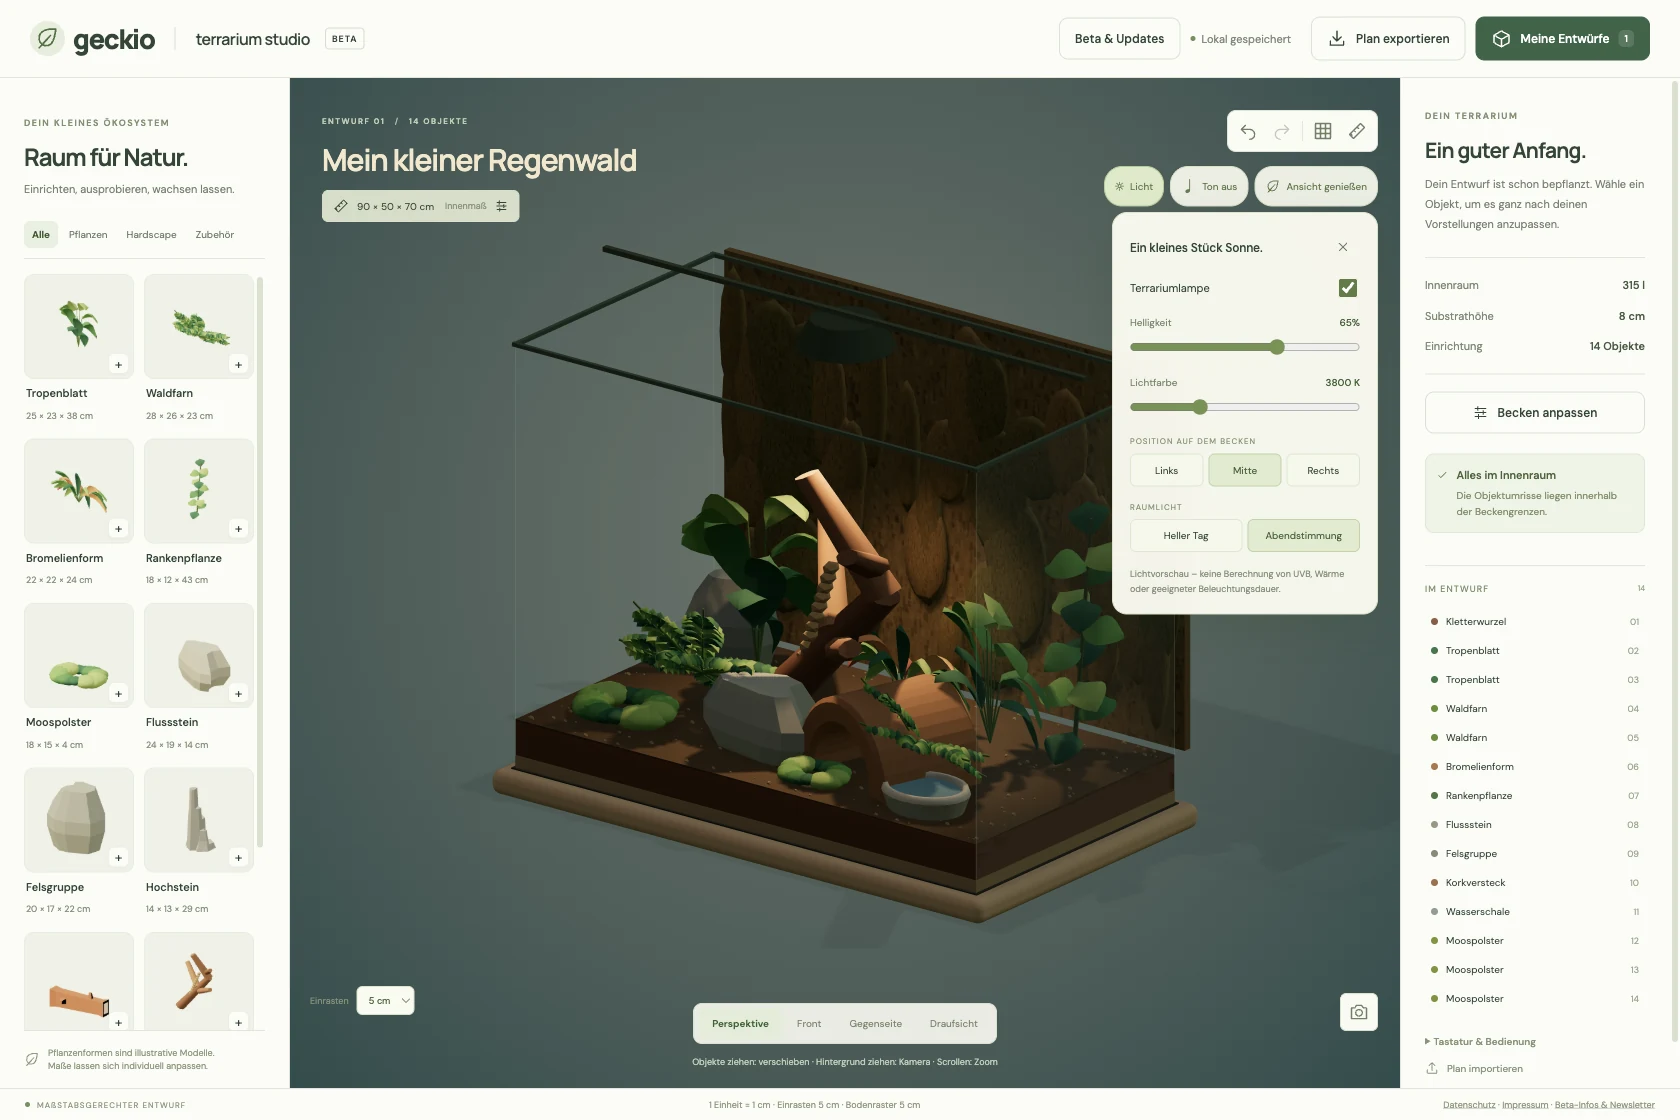
Lighting has its own compact controls: lamp on or off, brightness, warmer or cooler color, position, and daytime or evening mood. You can explore how the same arrangement looks under different light.
This is deliberately a visual preview. The Kelvin value controls a visual tint. The studio does not use it to calculate UVB provision, heat, illuminance or a suitable lighting schedule. Plant shapes are illustrative models as well, rather than botanically verified replicas.
“Ansicht genießen” — enjoy the view — hides the side panels and gives the design more space. After all the small adjustments, it provides a way to look at the arrangement as a whole. One click brings the tools back.
One attractive perspective is not enough
A single view can hide a lot. A plant looks well placed from the front, while the top view reveals that it occupies almost the entire depth of a corner. The studio therefore offers four fixed camera views: perspective, front, opposite side and top.
The top view makes the floor layout readable. The front view reveals heights and layering. The two angled views help make sense of the arrangement in three dimensions. An individual view can be saved as a PNG; the export bundle contains four views alongside the plan and camera data.
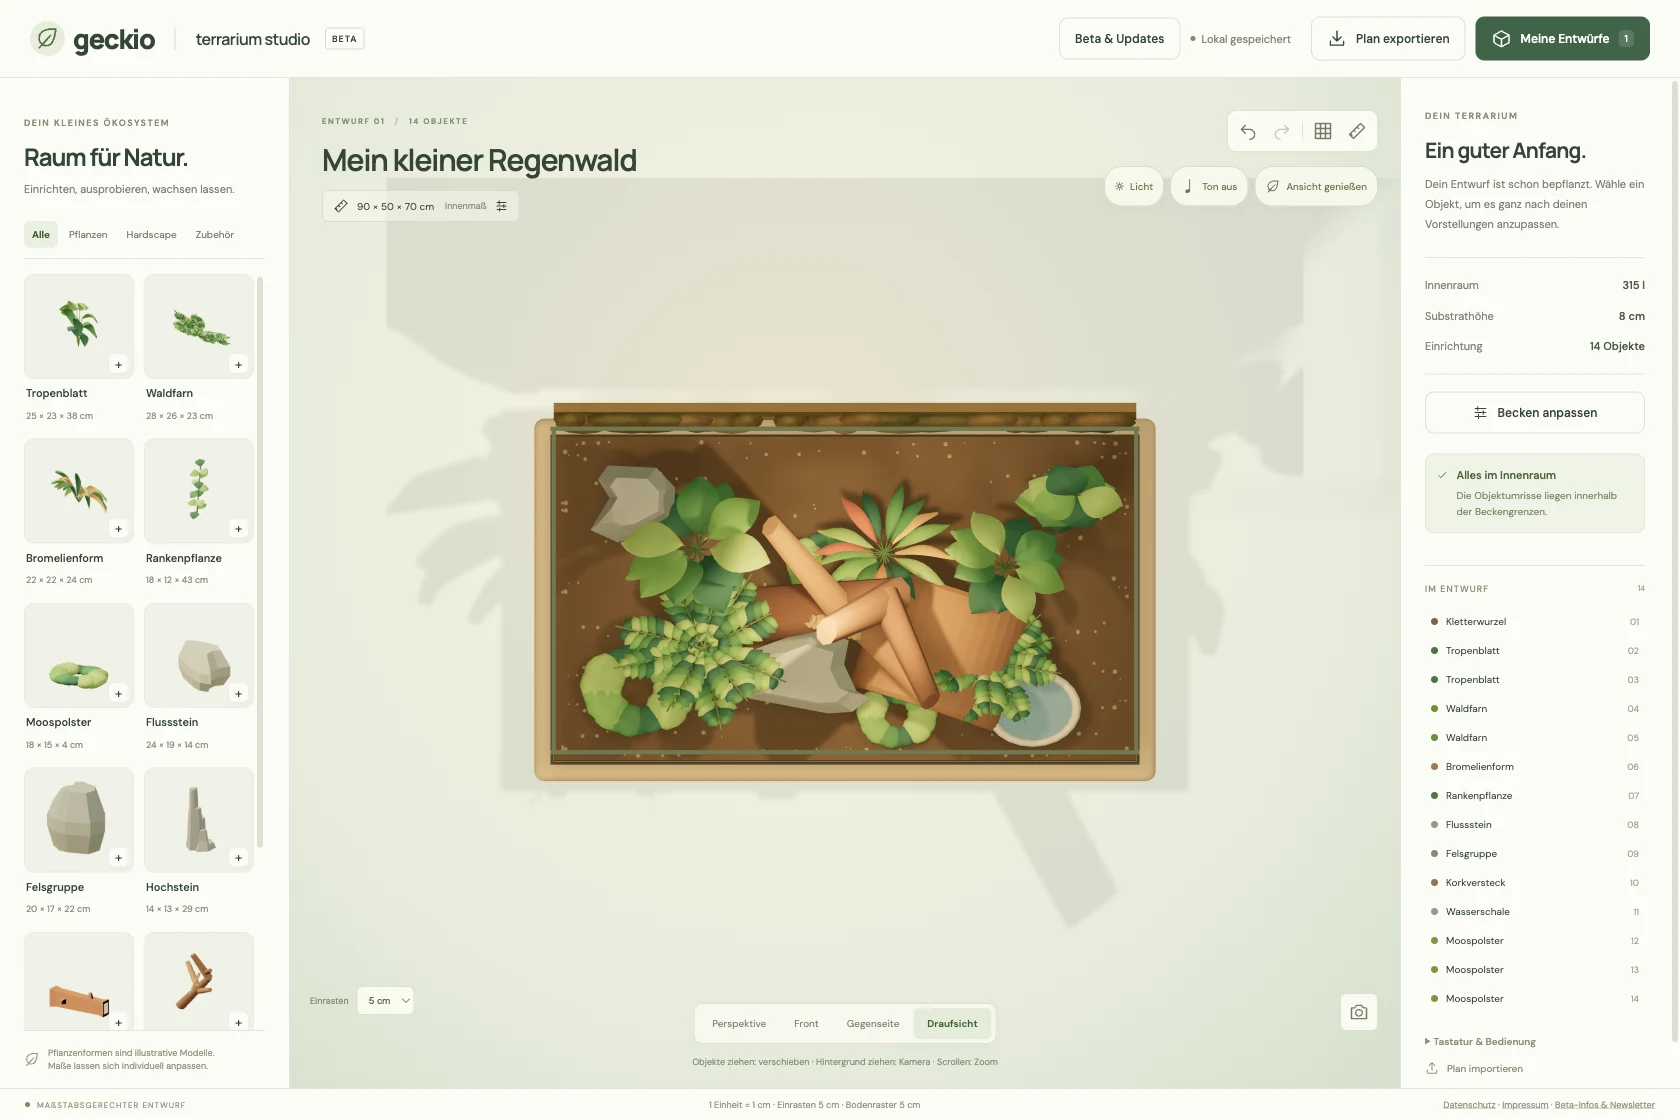
Drafts are saved in the current browser. You can manage and copy up to twelve named versions there. JSON export and import provide a backup and a way to move a plan to another device. Accounts and cross-device synchronization are outside the current studio.
Rearranging the interface for a smaller screen
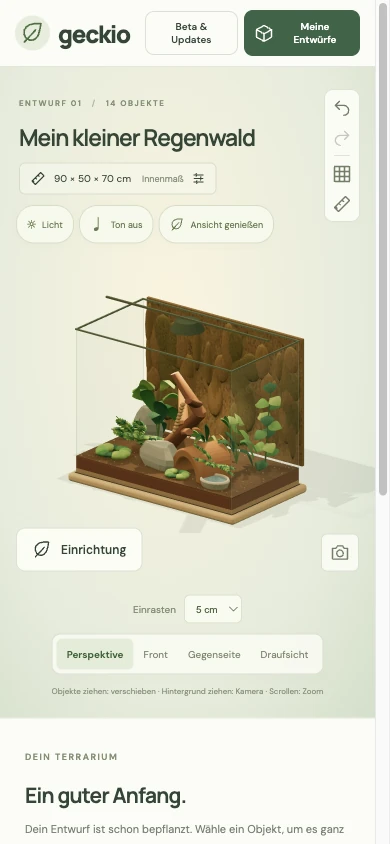
On desktop, the catalog, scene and properties are visible together. On a narrow screen, the 3D view needs as much space as possible. The catalog opens through “Einrichtung” — furnishings — while properties follow below the scene. Lighting and camera views remain available through compact controls.
The spatial work remains central. Numeric controls are still available, even though they no longer sit permanently beside the enclosure. For this article, I also opened the public beta in a narrow browser viewport; the screenshot shows that actual state.
Building a 3D planner with Three.js
The implementation combines Astro, Preact, TypeScript and Three.js. Astro provides the website, Preact the interactive controls, and Three.js renders the WebGL scene. Spatial data remains independent of the rendered meshes.
A data model for dimensions, placement and export
This excerpt from the TypeScript model shows the core of a furnishing item:
type Size = {
  w: number;
  d: number;
  h: number;
};
type Item = Size & {
  id: string;
  asset: string;
  x: number;
  y: number;
  z: number;
  yaw: number;
};
Dimensions and positions are stored in centimeters; yaw is rotation in degrees. In the plan, X and Z are measured from the left and back interior walls. Half the enclosure width or depth is subtracted for the centered Three.js scene. An object ID connects the form, plan and scene. Numeric controls, drag-and-drop, JSON export and undo therefore work with the same data.
Raycasting and drag-and-drop without camera conflicts
For object picking, pointer coordinates are made relative to the canvas and converted to the range −1 to 1. The Three.js Raycaster uses them with the camera to create a ray; the first hit identifies the selected object. Intersecting a horizontal plane determines its target position during a drag. In the front view, the studio uses a vertical plane instead.
OrbitControls are disabled while an object is being dragged. Pointer capture keeps the gesture attached to the canvas. Only on release is the new position committed to the plan and undo history. Camera rotation and object movement can share the workspace without competing for the same gesture.
Snapping, model dimensions and rendering on demand
Snapping first rounds the target position to the chosen grid, then constrains it to the enclosure boundaries. The object’s rotated footprint is included in that calculation. An oversized item remains visible as an issue; it is never silently shrunk.
Loaded GLB models receive a consistent origin at the bottom center and are scaled to their planning dimensions. Pop and settling effects use a separate child transform group. The renderer requests new frames for changes and active animations. An unchanged scene does not need a continuous render loop.
The studio uses localStorage for drafts. Those records belong to the current browser and website origin, making JSON export the way to back up a design or transfer it between devices. The same design question — how technical rules support a pleasant interaction — also runs through Engineering Emotion: Design Systems for Developers.
What the beta offers, and what could come next
The current beta combines to-scale spatial planning, direct object editing, four views, local drafts and exports with a quieter, playful interface. Three.js powers the scene. Some wood and rock models come from the Kenney Nature Kit, available under CC0; plant forms, the cork hide and water bowl are built procedurally in the project.
The result is a spatial design aid. Species-specific care assessment, climate calculations and fabrication drawings sit outside this beta. The experimental AI image preview used during local development is also absent from the public version. The interface figures in this article are real screenshots of the 3D planner.
For the next iteration, I am particularly interested in a moss brush: shaping an area with small organic variations while keeping its extent understandable. Subtle leaf settling and different material sounds could follow. These are ideas for further development, rather than existing features.
What interests me about this project is how much character a tool can gain through its interaction. Move a rock and get a clear response. Need more precision and the measurements are there. Feel happy with the arrangement for a moment and you can hide the tools to look at your little rainforest.
Questions about the terrarium planner and its development
Is the online terrarium planner free?
Yes. Geckio’s public beta runs in the browser without installation or a user account. The interface and example names are currently in German.
Can I use my own enclosure and furnishing dimensions?
Yes. Interior width, depth, height and substrate depth are editable. You can change the size, position and rotation of the included catalog items. The beta does not offer custom 3D model imports.
How do I save my terrarium design?
The studio stores up to twelve drafts locally in the browser. You can export JSON files and import them again later. A PNG shows the design; the JSON file preserves editable planning data.
Does the planner simulate temperature, UVB or plant growth?
No. It supports spatial layout and a visual lighting preview. Suitable care conditions need separate planning and checks in the real enclosure.
What powers the 3D configurator?
Three.js renders the WebGL scene, Preact drives the interface and TypeScript describes the plan data. Raycasting, snapping and a separate drag preview connect direct interaction with precise dimensions and individual undo steps.
Planning software, through the community’s eyes
The question appears outside this project too. In Software for planning a vivarium/terrarium, an orchid grower asks for a 3D tool that makes a layout easier to understand without a long learning curve. That is a useful description of the gap between a paper sketch and a full modelling application.
The discussion of Terrarium Builder’s Steam release raises another question: what should a digital terrarium help with? Comments mention trying a design before buying materials, while also asking about realism and plant growth. Those are different jobs. Terrarium Studio concentrates on proportions, placement and editable drafts; an attractive scene alone cannot validate an ecosystem.
Both are discussions about other tools and people’s planning needs. They offer useful reading alongside this development story.
Try the Terrarium Studio beta →
Cover: an editorial illustration. Project state and screenshots: 12 October 2026. Screenshots show the public beta’s German interface; click an image to open it at full size.
